Beautiful, but hard to get to: northern Norway
The hydro power plant is located in Northern Norway, a couple hour’s drive from Mo i Rana. Due to the urgency to get this problem resolved, in the middle of summer vacation period, our Application Engineer, Mr. Prosper Chekroun, had to hop on a flight, flying via Oslo – Trondheim – Mosjöen – Mo I Rana. For those of you used to travelling up to Northern Norway know it is almost like flying to the other side of the world in terms of changing planes. Going there as a tourist however is well worth it. The scenery is spectacular.
 Dramatic scenery from the ferry boat going across the river
Hydro power plant
The power plant in this case was a small size plant with two horizontal turbines. The case at hand called for measurement of flatness on the inlet flange as well as flatness and parallelism on the two outlet flanges that where to be connected to the turbines.
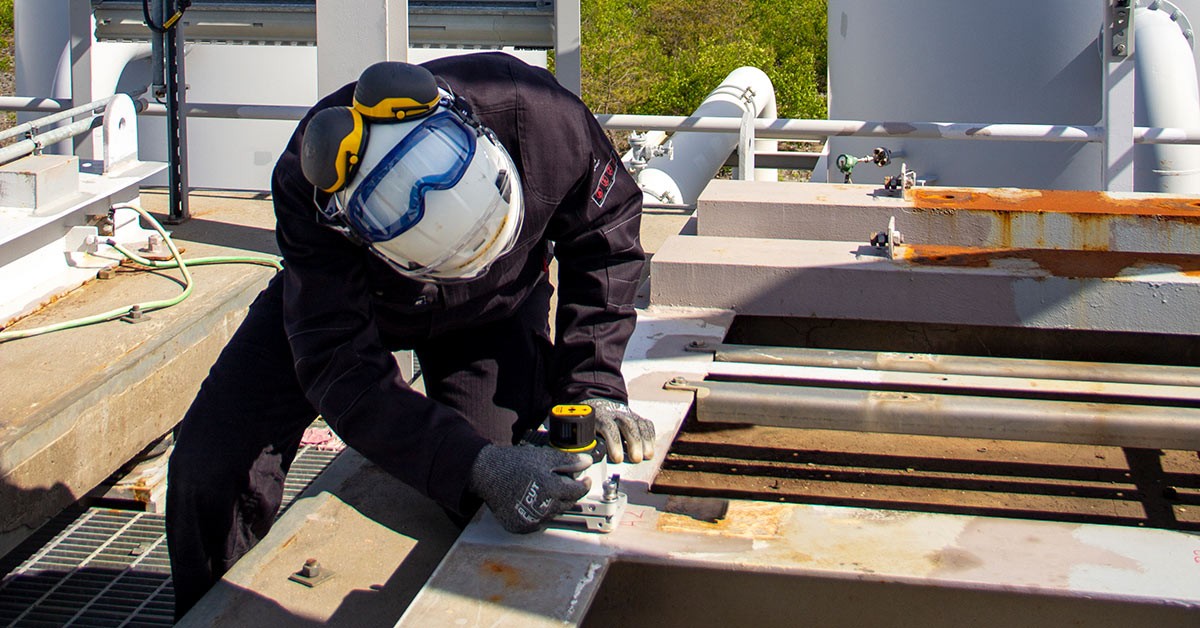
 Inlet flange
 Outlets inside the turbine hall
The pipe to the right in the turbine hall had to be repositioned during the installation and therefore the flange had to be checked for flatness, but also parallelism against the second flange, and possibly be corrected before the turbines where brought in. This would normally be done by piano wire or optical theodolite equipment. As this measurement required a higher accuracy; precision laser alignment was chosen as a method instead.
Starting with the inlet side
Using a standard Easy-Laser® E910 Flange flatness system we first measured the flatness of the flange on the inlet side. Attaching the laser transmitter to the flange we are able to measure up to 900 points around the flange in five circles. This allowed us to check the flatness, but also taper.
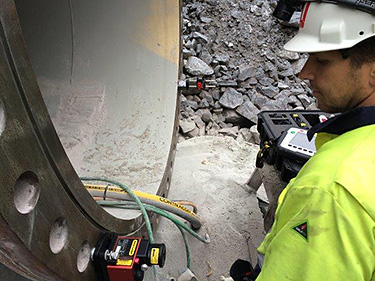 Measuring flatness of the inlet flange
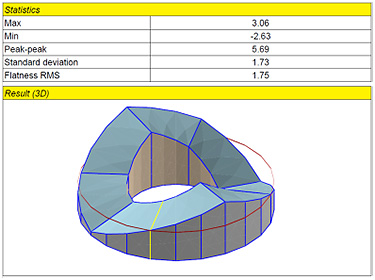 Report generated in the instrument (measurements in mm). The results were encouraging, this flange was within specification.
A bigger challenge: the outlet
The outlet side posed more of a challenge. Traditionally we would use a prism to measure the parallelism of the two flanges, after first measuring flatness like in the inlet case. In this case the two flanges/pipes had an offset of approximately two meters (6 ft 6 in) which made that setup more complicated. But Prosper had an idea: moving the two reference points in the building he could set up two new reference points parallel with the two flanges and then buck into them to check for parallelism between the two flanges. Setting up the laser in level, and bucking into the two new reference points we could use four points on the flange to check for horizontal and vertical parallelism against the second flange.
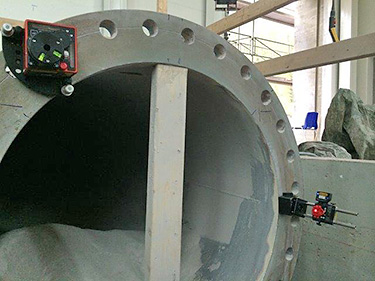 Measuring horizontal parallelism on the outlet side
Results
The flanges on the outlet side where both found to be out of tolerance. Using the data from the measurements it was decided to call in an onsite machining contractor to correct the flanges. Using a high precision laser alignment system such as the Easy-Laser® E910 the customer was able to save valuable time. Had the turbines been brought in before corrections there would have been a significant delay on the project. The Easy-Laser® range of precision alignment tools are extremely versatile, and in the hands of a capable technician can overcome pretty much any obstacle.


