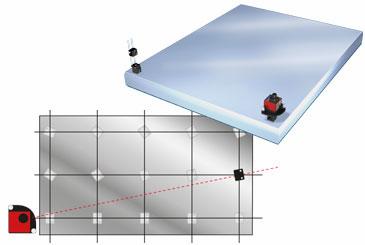
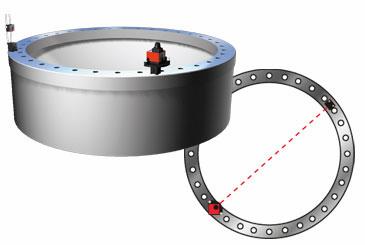
A basic prerequisite for machine installation is that the base is flat. It is also a requirement for machine tables, so that manufactured parts then maintain tolerances. Flanges on tower segments for wind turbines are also checked for flatness, but here the requirement can be linked to a desired inclination of the plane (taper).
First, the laser beam is roughly aligned along and across the measurement object. The detector is then positioned on the selected measuring points and the values registered. According to the measurement, three of the measuring points are set to zero, and the other points are recalculated for the newly created reference plane. The measurement values at the other measurement points will show the deviation from the laser plane.
The measurement of flatness/twist on circular planes such as flanges is also based on the use of three reference points, situated at intervals of 120° around the circle. Decide the number of measurement points and which will be the reference points on which the laser plane will rest. All measurement results displayed are now relative to the three selected reference points/laser plane. Easy-Laser has measurement systems specially designed for checking flatness of flanges for wind turbine towers (see Easy-Laser® E910/E915). The software included helps you with advanced best-fit calculations.
The laser beam is adjusted according to the vials on the laser transmitter, and the measurement value at the first measurement point is set to zero. The measurement values at the other measurement points will show the deviation from the horizontal plane.
There are several alignment systems that measure flatness.

