All rotating equipment is exposed to dynamic forces of different kinds, resulting in nozzle load. This will have a negative impact on the operating performance of your asset. Dynamic measurement is a test to make sure your equipment remains free from stresses such as thermal expansion and pipe strain that can cause nozzle load.
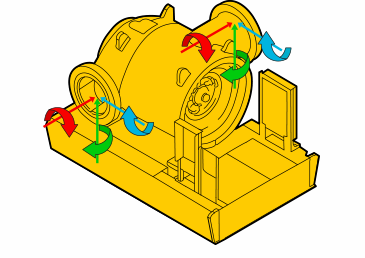
Nozzle load is the sum of all forces and movements acting on rotating machinery which are caused by thermal expansion, pipe strain, additional heavy loads (e.g. silencers) and everything else which will affect the operating performance of your asset. There are of course dynamic forces acting also on other types of machinery, but in this text we talk about rotating equipment like for example pumps and compressors.
Thermal expansion is a machine condition where the temperature of one of the aligned assets rise significantly compared to another. For example, a pump aligned to an electrical motor. The operating condition of the pump might be hotter than the condition of the electrical motor due to the temperature of the pumped media. Hotter conditions will expand the housing of the pump and consequently move the rotating centre of the shaft, causing misalignment. This is an example of a dynamic force.
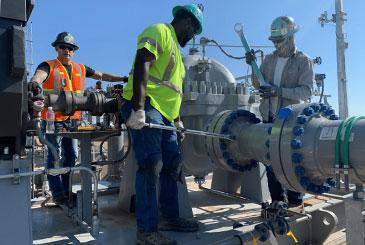
Pipe strain is when the pipe flange is misaligned to the machine inlet or discharge flange, thus distorting the housing of the machine. Housing distortion puts tension on all internal parts and affects the functionality of lubrication, bearings, seals and other items, and will also lead to misalignment.
We recognize two types of pipe strain: static pipe strain and dynamic pipe strain. Static pipe strain is the condition when the pipe flange is misaligned to the inlet/discharge flange. This is due to a poor assembly procedure or inadequate pipe support, and maybe because no flexible connections/compensators are installed. Dynamic pipe strain occurs when the system is in operation, and is due to thermal expansion, plus weight and pressure of the media/fluid, plus inadequate pipe support.
All excessive forces applied on the machine nozzles/ports will generate stress in the casing, and it might change the designed geometry of the machines. It will cause misalignment, internally and externally. Leakages will appear. A distorted casing might lead to internal contact between stationary and rotating components of the rotating machinery. This situation will lead to catastrophic failure.
The dynamic measurement must be performed at SAT (Site Approval Test) before starting the operation, or every time the equipment has been removed for overhaul and placed back. Static pipe strain is measured while the equipment is in installation phase, during pipe attachment, or by disconnecting existing connection and measuring the misalignment.
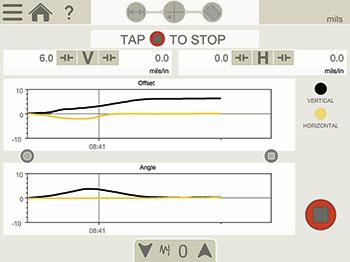
EasyTrend is a specific Easy-Laser® application which measures and documents any movement of rotating machinery in both axis, horizontal and vertical, in real time. Recording of movements can be set to desired time intervals.
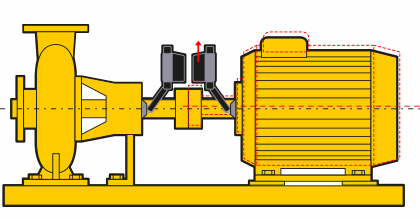
For the measurement to be reliable, special brackets need to be mounted on the machinery. One measuring unit is mounted on the driving machine and the other one on the driven. (See Fig. 1) If there is a movement caused by e.g. thermal growth, this will be detected, both angle and offset.
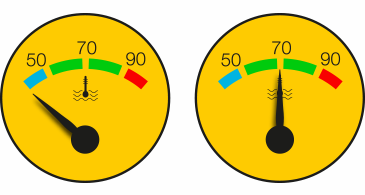
Dynamic pipe strain must be measured during operation, starting from cold condition, until the system reaches full operating condition. Or starting from full operating condition to complete stop and cool down of the entire system.
Start the measurement before the machine starts the operation (offline) and continue until the machine has reached the operating temperature. Or you can start measuring while in full operation, and stop when the machine cools down to ambient temperature. (See Fig. 2)
If the results of the measurement show no problem with dynamic forces, we can feel comfortable when starting up production again. But what do we do if dynamic measurement reveals unexpected movement on the machinery?
To start with, proper measurement documentation must be submitted for analysis of the cause. Then the first thing to consider is the shaft alignment and the thermal growth offsets. Considering the offset plus the shaft alignment is out of tolerances, we should start by checking for soft foot. First, we disconnect the process piping from the machine to release the nozzle load which could affect our measurement. (Note! Of course, all safety procedures must be followed for any type of action.) Then we check the soft foot. If soft foot appears, it must be corrected. After the soft foot correction, we can continue with shaft alignment. After shaft alignment is performed, we continue searching for pipe stress. Now you can say you are sure you have a reliable machinery installation!
The dynamic measurement program EasyTrend is standard with the XT Alignment app, however you need the Easy-Laser® XT770 system with 2-axis measuring units, and the DM-brackets. You find the brackets on our accessories page.
