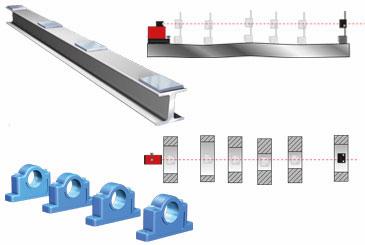
Straightness is measured daily in many industries. For example, beams, rolls, pipes, machine ends, machine runners and conveyors. Straightness is often a basic requirement in order for a machine to function correctly and/or produce fault-free parts.
The basic principle of straightness measurement is that all measurement values will show the position of the detector unit relative to the laser beam. The laser beam can be envisioned as a very, very long, absolutely straight and weightless ruler.
First, the beam is roughly aligned along the measurement object. The detector is then positioned on the selected measuring points and the values registered. According to the measurement, two of the measuring points are set to zero, and the other points are recalculated to this reference line. New measurement points can be added or removed. An offset value for all points can be added for automatic calculation of correct adjustment values. Adjustment can be made with live values for continuous feedback.
When the measured object is to be the reference (relative reference), the laser beam is levelled to the detector positioned at the two reference points. This levelling procedure is always carried out according to the same principle – zeroing the laser. When using the horizontal plane reference (absolute reference), the laser beam is levelled according to the vials on the laser transmitter (XT20 or XT22). Then all detector values are shown in relation to the horizontal plane.
It is also possible to carry out simpler straightness measurements with S and M units (i.e. no separate laser transmitter is used), if the devices have dot laser technology (available in, for example, the XT770 system). The S unit is used as a reference transmitter and the M unit is used as a detector. However, it is not possible to use horizontal plane as a reference in this instance. Use the Values measurement program and calculate the straightness manually.
