Repeatability
Repeatability is the consistency of measurement results between consecutive sets of readings.
Laser alignment systems can produce highly repeatable and reproducible measurements with just a few components attached to rotating machinery. When troubleshooting the cause(s) of lack of repeatability, it is helpful to try to identify some of the most common and easy-to-correct culprits.
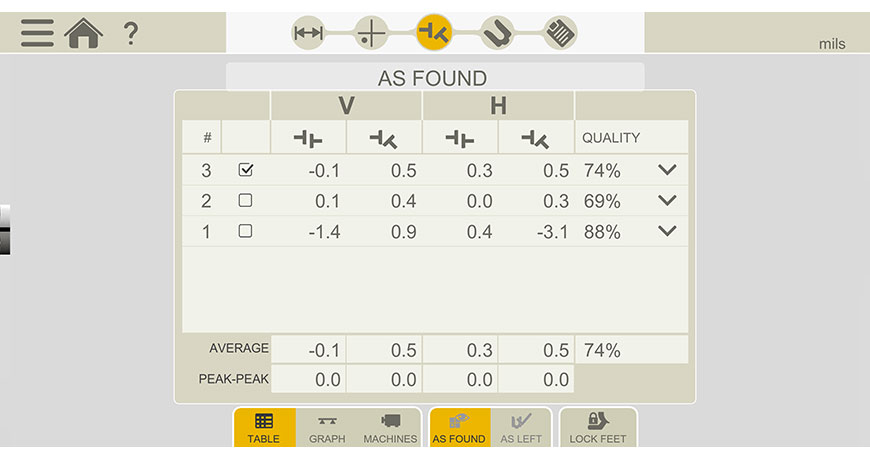 “As found” values in the XT Alignment app (measurements in inches).
To avoid a lack of repeatability, make sure that:
- Loose components such as measurement units or brackets are affixed to the shafts and tightened to prevent slipping or rocking of any kind.
- The measurement unit assembly does not rub on or strike any stationary component during a sweep measurement.
- Backlash effects due to play in the coupling are minimized.
- You use the appropriate measurement mode for the machines: i.e. sweep, multipoint, 9-12-3, etc.
- If measuring using a sweep function, make sure to keep the rotation going in only one direction during measurement. Never let the heads rotate in the opposite direction.
Establishing repeatability of the alignment system is one of the most important steps in shaft alignment. It can make the difference between an easy-to-accomplish job or a job where you’re chasing your corrections.
Response to corrections
Along with measurement repeatability, the laser alignment system’s ability to display the correct moves to bring the machines into alignment is crucial. If the machines do not respond to these corrections, you’ll be chasing moves throughout the alignment process – which isn’t fun!
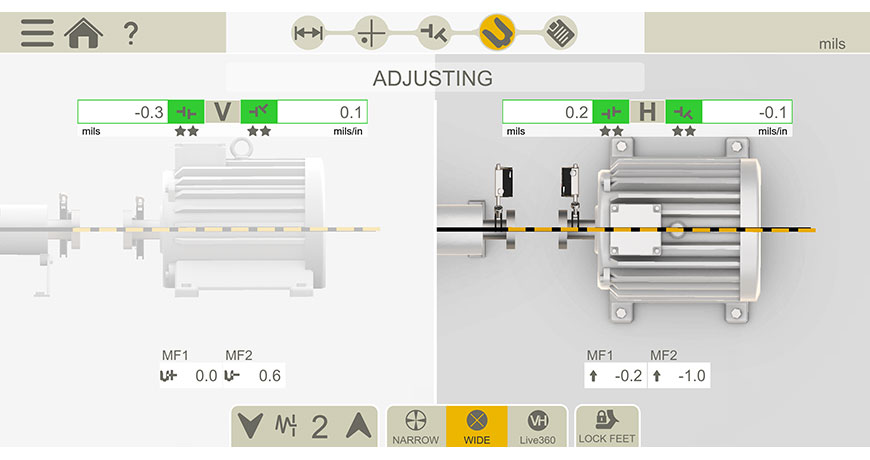 The live adjustment view in the XT Alignment app (measurements in inches).
If the results don’t reflect the moves made, the following can be the causes:
- Incorrect dimensions entered for the machinery. The alignment system relies on the correct dimensions being entered in order to predict the correct move amounts.
- Coupling strain can cause small deflections in the machine shafts that can misreport the correct shaft centerlines to the alignment system. Precise measurements of the rotational centerlines is crucial in determining the misalignment between them.
- Soft foot, amongst other negative effects, can hinder adjustment attempts.
In addition to the above considerations, environmental vibration, external stresses on the machines, and thermal effects can cause a lack of response to corrections. Identifying and accounting for these causes will make your alignment easier overall and help you get it done faster.
The pipe test
If you’ve gone through each of the possible sources of error and are still experiencing problems, there is a simple field test you can perform to ensure the laser alignment system’s functionality.
- Mount the measurement heads 150–250 mm (6 – 10”) apart on to a piece of pipe of a diameter no less than 50 mm (2 inches).
- Start the horizontal shaft alignment program and enter the dimensions for the laser heads. Foot dimensions are not needed.
- If V-blocks are not used, take measurements by rotating the pipe with your hands
- Take at least two separate measurements turning the shaft 360 degrees.
- The coupling results should be zero or very close if the system performs correctly.
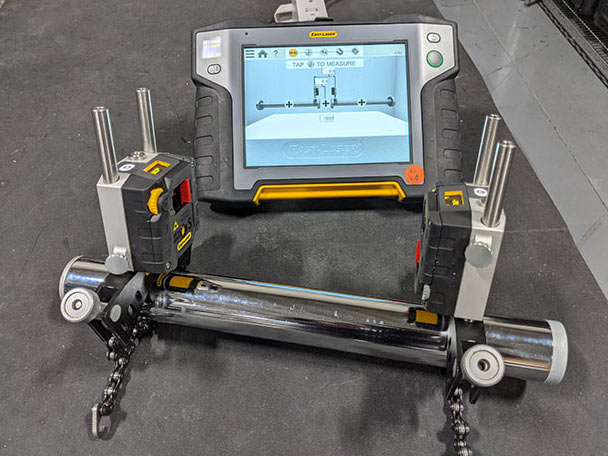
Laser shaft alignment systems are reliable tools that produce highly repeatable results and simplify shaft alignment. That said, technicians need to know that the measurements they’ve taken have minimal uncertainty and errors. That is where calibration comes in. Sending your unit out for periodic calibration checks will ensure the reliability of your system. You find your nearest Easy-Laser calibration center here!
The contents of this article were originally posted on the Ludeca Blog.

