However, have you ever wondered: Is it the same to align a machine with an operating temperature of 40 °C and a machine with an operating temperature of 90 °C?
This is where it all gets interesting.
Thermal growth is mainly caused by the temperature difference in a machine when it is offline (cold) vs. online (hot). High temperature causes metals to expand, and different parts of the machine will expand differently depending on the material. This can cause a machine that is perfectly aligned while not in operation to be misaligned out of tolerance when it’s running.
How do we measure thermal growth?
Thermal growth can be measured by first taking an alignment reading when the machine is cold and again immediately after it stops, when it has reached full operating temperature. However, this method might not always be practical due to safety concerns.
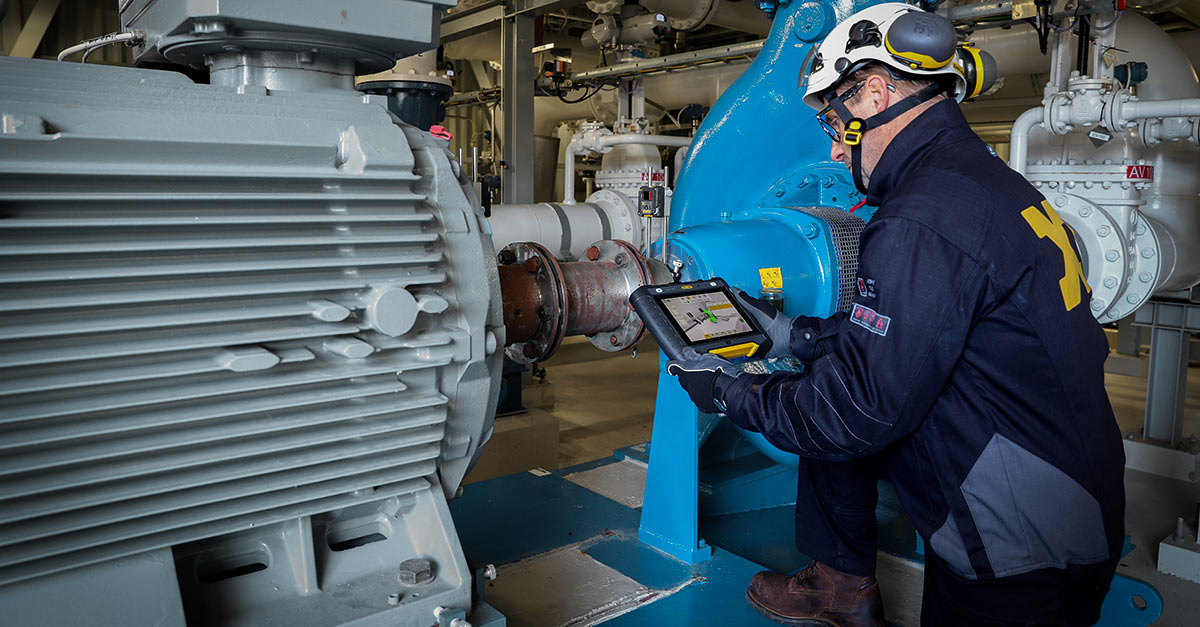
Easy-Laser’s dynamic measurement brackets and the program EasyTrend are specially designed to deal with this. The brackets allow us to mount the laser measuring units on the driver and driven machines and measure alignment values in real-time, while the machine is operating. They are specially designed to prevent the transfer of machine heat to the measuring units, as you can clearly see in the infrared image.

Gearbox – generator alignment on site
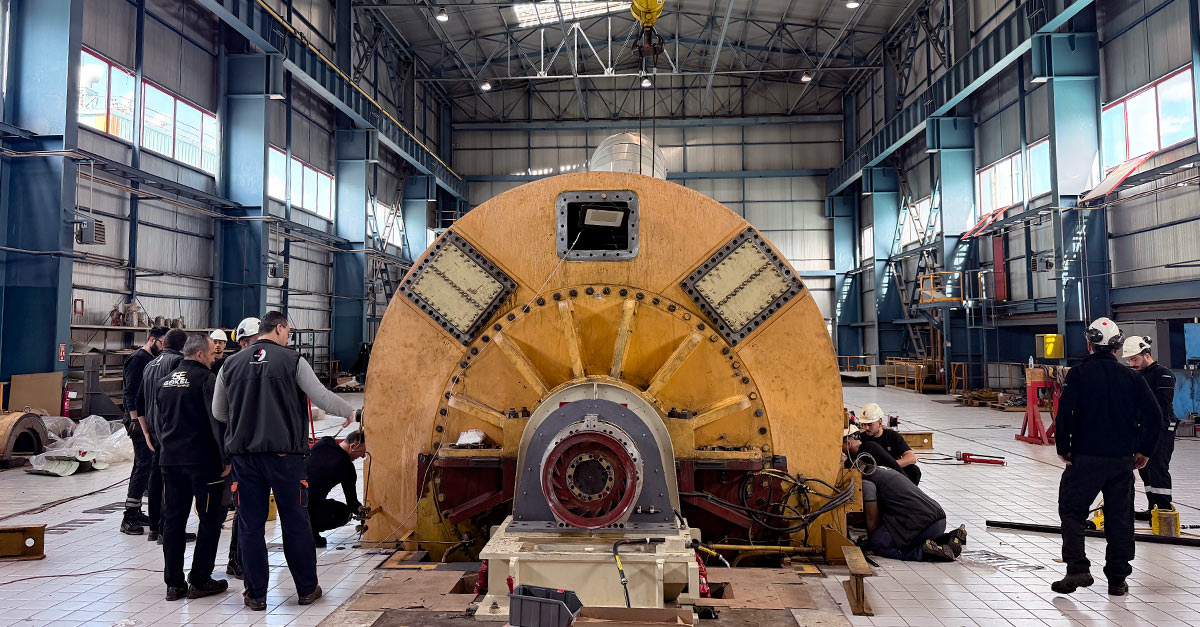
Our partner SCI was recently called to perform an alignment job in an energy plant outside of the city of Puebla in Mexico. The machine train consisted of a combustion engine, a gearbox, and an electric generator. The customer stated that they had aligned the train before, aiming for a tolerance within 0.06 mm in cold condition. The manufacturer had not provided any information about thermal growth.
Fransisco Sosa from SCI explains:
"We decided to perform some measurements using the EasyTrend program to achieve precision alignment of the gearbox–generator coupling during operating temperature (hot condition).
In this case, the dynamic measurement brackets were very helpful. Once they were mounted on the machine, we started measuring from the startup of the equipment and then for approximately 3 hours to see the thermal growth.
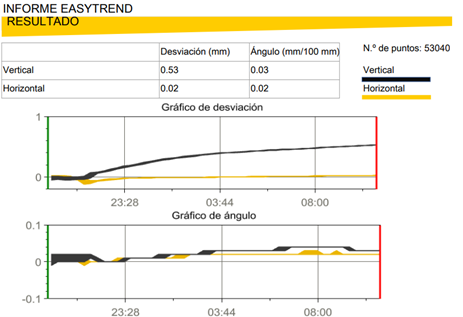
We were able to see in real-time that the gearbox moved 0.53 mm in the vertical direction due to its operating temperature, which was almost 80 °C. Movement in the horizontal direction was negligible. The operating temperature difference between the gearbox and generator was approximately 30 °C.
When the equipment was turned off, we kept measuring the dynamic movement without vibration during the cool-down period (8 hours), to corroborate the result."
The measurement report
The black line in the graph shows the offset and angularity in the vertical direction, and the yellow line shows the horizontal direction. The expected thermal growth can clearly be seen.

Dynamic measurement results (hot to cold transition).
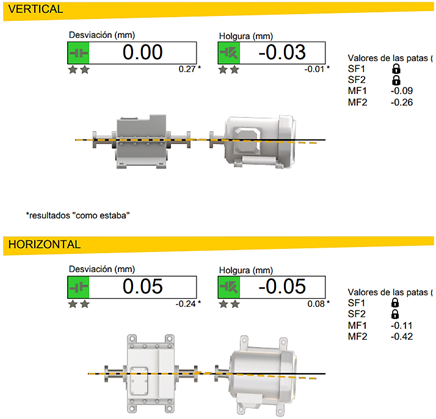
When checking the alignment after some time of operation it showed the equipment was well within tolerance, as you can see in the report.

Alignment results in hot condition.
In conclusion, dynamic measurement is a great complement that offers valuable real-time insights into your machine’s performance. It will not only help to extend its service life but also minimize downtime and maintenance costs – and at the price of two additional brackets, that is cheap insurance!


