In early 2014 at a local exhibition, we were approached with an inquiry from a technical department at a leading pulp and paper machine builder. They manufacture various machines and components for different parts in the process. Their inquiry; measure deviations from the specified diameter and straightness at large cylinder shaped objects that they manufacture, install and renovate.
Time consuming procedure
We visited them to learn more about the product, large welded cylinders. It had to meet narrow tolerances concerning the diameter and straightness. To establish whether it was within tolerance or if any deviations had to be corrected, with the existing method, the inner diameter was measured with micrometers. The straightness was not being measured as they relied on their precise production method.
To find any defects that has to be corrected when installing and testing at customer site is both time consuming and costly. The location of the cylinder in the machine is inconvenient and installation requires cranes and manpower. Before production tests, other heavy components has to be installed.
Starting to look for a solution
To reduce these unfortunate occasions a new measurement procedure and measurement documentation was requested. At that moment we did not have a complete solution, but we did not turn their inquiry down because it was such an interesting problem to solve. It was possible but we had to engage our engineering department.
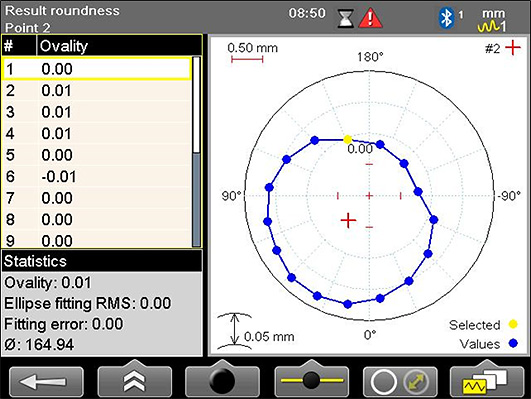
The display for roundness result.
Taking it a step further
We met with the customer again at the end of 2014. We presented our idea based on the Straightness multipoint measurement program. With the use of new custom made brackets and by taking multiple measurement points at different positions throughout the cylinder, the software already offered a solution for the straightness measurement. What we had to include in the same measurement was a refined software where deviations from the nominal diameter could be located.
When discussing the project we also realized that we could bring even more value to the measurements by locating local deviations from roundness. The customer already had an existing report form which they preferred to use also in the future. Compatibility with this was solved by creating a custom made template in our existing PC report tool EasyLink.
Completing the solution
In early 2015 we came to an agreement about the project, and our development department started a software project. The software had to meet up with the specifications for this project, but at the same time we wanted to keep it open for other applications so that more Easy-Laser® users could benefit from the new functionality.
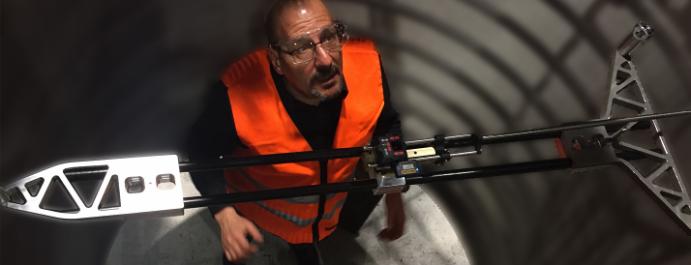
Simultaneously the mechanical design of the brackets started. In this case one challenge was the sheer size of the objects to be measured. The diameter varied from 800 mm to 3200 mm [31″ to 126″]. And because of the risk for deformations the cylinders had to be measured vertically. Considering ergonomics the brackets had to be as light as possible, but still adjustable for different diameters. The solution: a clever carbon fibre and aluminium design.
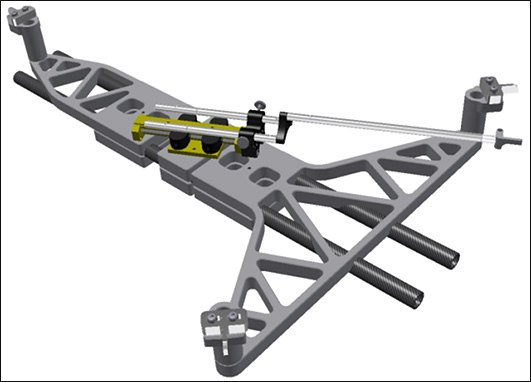
The bracket had to be both ridgid, light and adjustable for different diameters.
Delivering more than expected
Three months later we executed an acceptance test at the customer’s factory. The test exceeded our expectations! During the test we also found out that they could perform another measurement; the squareness between the centre line of the cylinder and a flange on it. This measure is critical for the function and has a narrow tolerance. This measurement was carried out within the same set-up of the system. After some minor adjustments the system was delivered, and training of the technicians was carried out in the end of summer 2015.
Versatile products creates opportunities for customization
In this case a customization resulted in an even more versatile standard product. The straightness multipoint program offers high quality measurement results. By registering multi-measurement points in a bore or bearing a high accuracy centre-of-circle calculation is determined. The new roundness measurement function described above is included in the multipoint program where it is executed at the same time as a straightness measurement is carried out. If a single bore or bearing is to be measured, roundness measurement is also available as a separate application in our geometrical systems.
Advantages with roundness measurement
Finally we would like to summarize the advantages with roundness measurements:
-
High quality data when evaluating the quality of a straightness measurement.
-
Determination of any ovality.
-
Determination of local deviations from a perfect circle.
- Find deviations from a nominal diameter.
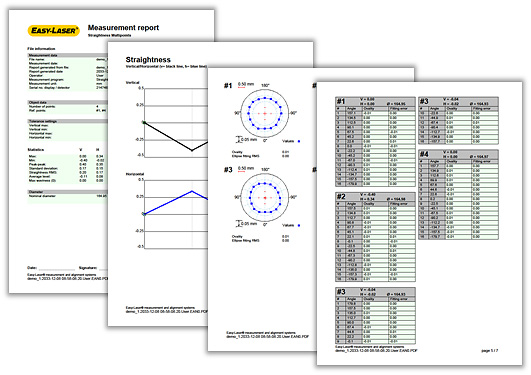
The output from the program is extensive reports.
If you have got stuck trying to solve a tricky measurement and alignment problem in your production, give us a call. We would be happy to assist with a clever solution!
Learn more about our customized measurement solutions.

